Drilling and Wiring
With the balustrades all installed I was now time to install the wire. Everything that I had read so far on the website for the products were to create a template for drilling. From there it was just a matter of using a 10mm spade drill bit to go half way through the post. Then perform the same operation from the other side.
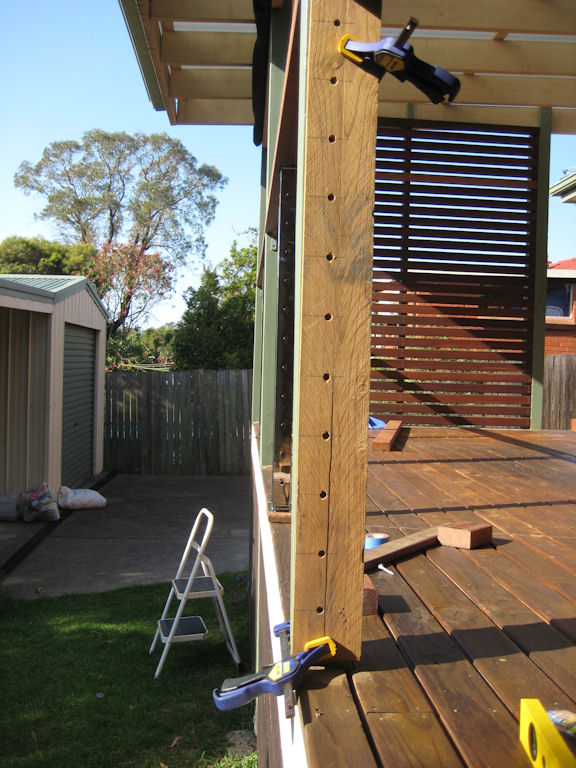

Here you can see all of the holes now drilled. This piece of work made me the most nervous as drilling through a post supporting the main pergola I didn't want to do anything wrong. But keeping the drill bit straight and by drilling from both sides ensured that risks were kept to the minimum.

Next thing to do was install all the spigots on the end post. But I first wanted to understand was how deep I needed to drill the pilot hole to have the spigot flush against the wood. Again grabbing an old piece of off cut that I had lying around I drilled a test hole.

And then installed the spigot. You can see it sitting flush here and I was ready to go.

So here I had the first spigot installed. The beauty of the spigot is that it can move around and it is not until the wire is installed that will make it sit straight. And here is the shot with one of the end posts with all the spigots installed.


And again on the other side.

With all the spigots now installed on the main deck it was time to move onto the stairs. So it was just a matter of measuring out each of the holes and marking the posts ready for the pre-drilling.


Given the balustrade is has an angle to it I was wondering how to ensure a the pre drilling would be done at the correct angle. Even though the spigots allowed for a certain amount of play I wanted to get as close as possible. So I came up with the idea to use a piece of wood that was associated with the previous balustrade as it was cut at exactly the same angle. The next shot shows how I clamped it against the post to give me a guide as to the angle and it worked well.

The same steps of clamping the guide piece and then pre drilling was performed on the upper deck post but this time around I swapped the guide piece around to give me the opposite angle to that of the lower power. After drilling the 22 pilot holes I installed all of the spigots and then completed the installation of the wire.

With all the wires installed by hand it was time to complete the installation by tensioning the wire using the set of tools provided by Stefan at STK Engineering. It was just a matter of keeping the wire firm whilst tensioning using the spigot. Took me no time at all to get all of the wires tensioned to the point where they were firm and gave a nice twang when I ran my hand over them. To complete the installation and tensioning the final step was to wind the lock nut against each spigot.

Click here to look at the final product