Rebuilding the Gate
Well the first thing that I wanted to achieve was the rebuilding of the gate. The existing one had certainly seen better days. It consisted of a post cemented into the ground with another post dyna-bolted into the outside brick work of the house. The post had certainly deteriorated to the point where the left hand side of the gate was sagging causing the gate on the left to drag along the concrete as you opened it. Security to the back of the house was another aspect that I was looking at improving on with the new gate along with the aesthetic look.
Here is a picture of the existing gates.

Here is a shot of my mate Adam, with the 90mmx90mm treated pine post going in. Digging out the existing post and concrete was a job in itself. A combination of a 6 foot crowbar, mattock and spade helped us get out the old and prepare the hole for the the new post. Here is a shot of part of the old concrete surround with part of the old post still embedded in it.

The 90mmx90mm post was 2.4m in length. Trawling the websites on how much of the post was to be set in the ground it came out to around 60cm. We ended up setting the post around 70cm into the ground.

The two bags of Quick Set for putting in the post. Like the bag states, it sets in 15 minutes.

The 90mmx90mm post is in along with the quick set. You have to act real fast with this stuff, but it was definitely manageable with two people. The 90mmx45mm treated pine post was simply dynabolted to the side of the house. We decided not to re-drill holes for new dyna-bolts but instead used the existing bolts that were already there from the previous post. We had to countersink some of the holes because we didn't have the length of bolt required, but looking back at the original post that was there they had the same issue.


Here we are starting the building the gates. With the posts in the ground we were able to take measurements from the width of the two gates, allowing for a gap at the edge of the posts and in the middle. The design of the gate is to closely follow what was there previously. Each gate was to be 1.8metre treated pine fence paling.

Here we have one of the gates mounted. This was definitely a two man job. We had the gate propped up with a couple of pieces of off-cut wood underneath. We left a decent amount of gap at the bottom to cater for an amount of sag over time.

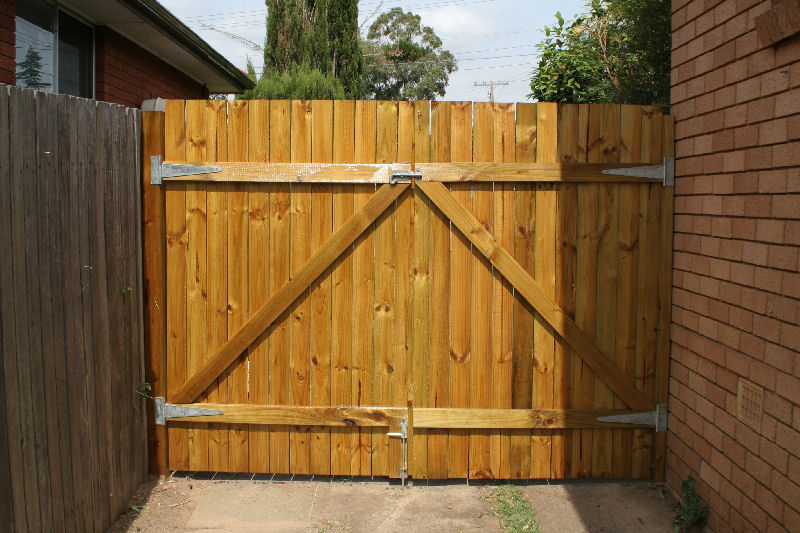
Here we have both the gates already mounted on the posts. The supports for the gate are 70mmx35mm treated pine. Hinges are galvanised steel. I don't want to go through the processed of building these gates again.

Here is another angle from the street side with the gates closed and opened.

The next step with the gate was to putting in the drop and slide bolt. These both help in keeping the gate from swinging open in the wind. Even though I could have taken the slide bolt from the old gate, I decided on getting a new galvanised one. And in the case of the drop bolt I was fortunate enough to use the existing hole in the concrete. It was just a matter of lining it all up and attaching it to the bottom of the gate. To provide extra support a piece of 70mmx35mm treated pine was used below the lower to the bottom edge of the gate. The photo shown below was taken around 6 weeks after the gate was originally built and over that time the amount of warping and shrinking of the treated fine fence palings was certainly significant.

The finishing touches on the fence was to give it a couple of coats of an external varnish and to attach 2 hooks to allow the gates to be held against the house and fence to allow me to back out the car without worrying (too much). Here we have a shot of the completed gate with 3 coats of varnish. I'm debating whether or not I would give it one more coat just to be sure.

The gate definitely looks very shiny and protected. I'm curiously to see how long before it starts to deteriorate. With the gate being located on the north side of the block it cops the Australian sun pretty much all year round.
Here is the shot of the gates now with the hooks installed and position right against the fence and house. This will make it so much easier to get the car in and out.
