Cutting and Routing
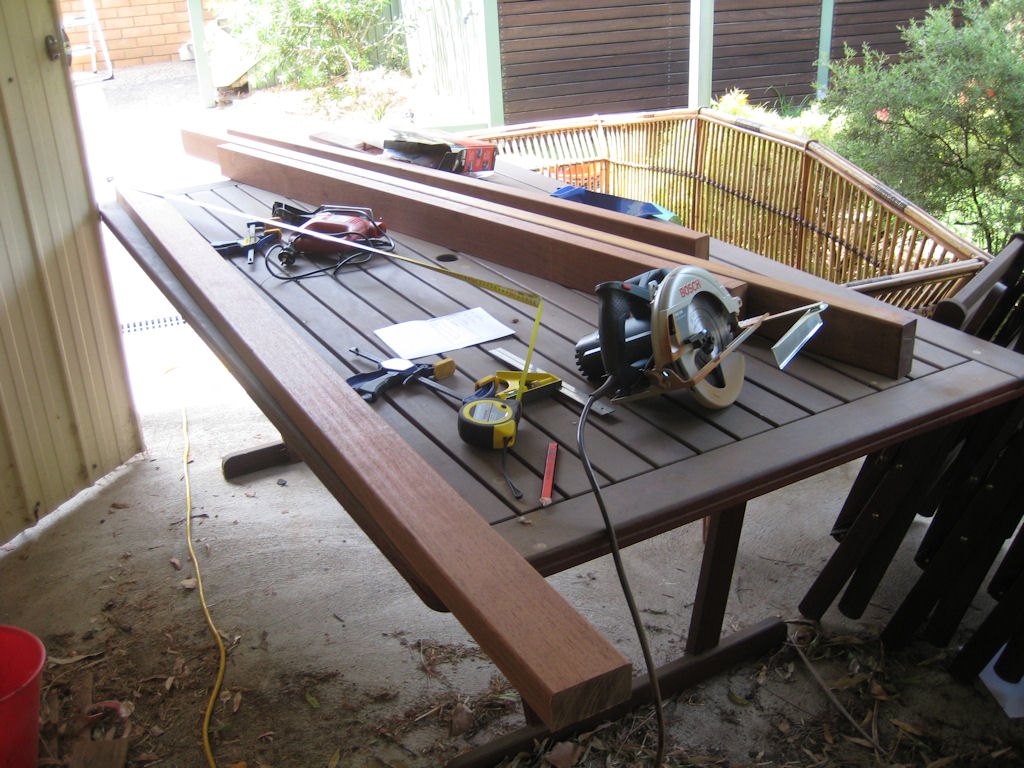
All the Merbau hardwood was supplied for the balustrades by Blacktown Building Supplies. I ordered 3 by 2.4metre lengths and 2 by 1.8metre lengths and got them to route the top and bottom edges of each of the pieces with the top getting a more pronounced route. This, as you can imagine, takes of the edge off and makes the feel of the balustrade all the more accommodating when you are leaning against it. This was a minimal additional cost for setup and machining and was well worth it. When I typically purchase wood I get it all delivered but was able to fit all 5 lengths in the back of my hatch back, just.
The first thing was cut each of the lengths of wood. For the balustrades going onto the top deck I used a circular saw and even though the pieces are hardwood the saw got through it easily.
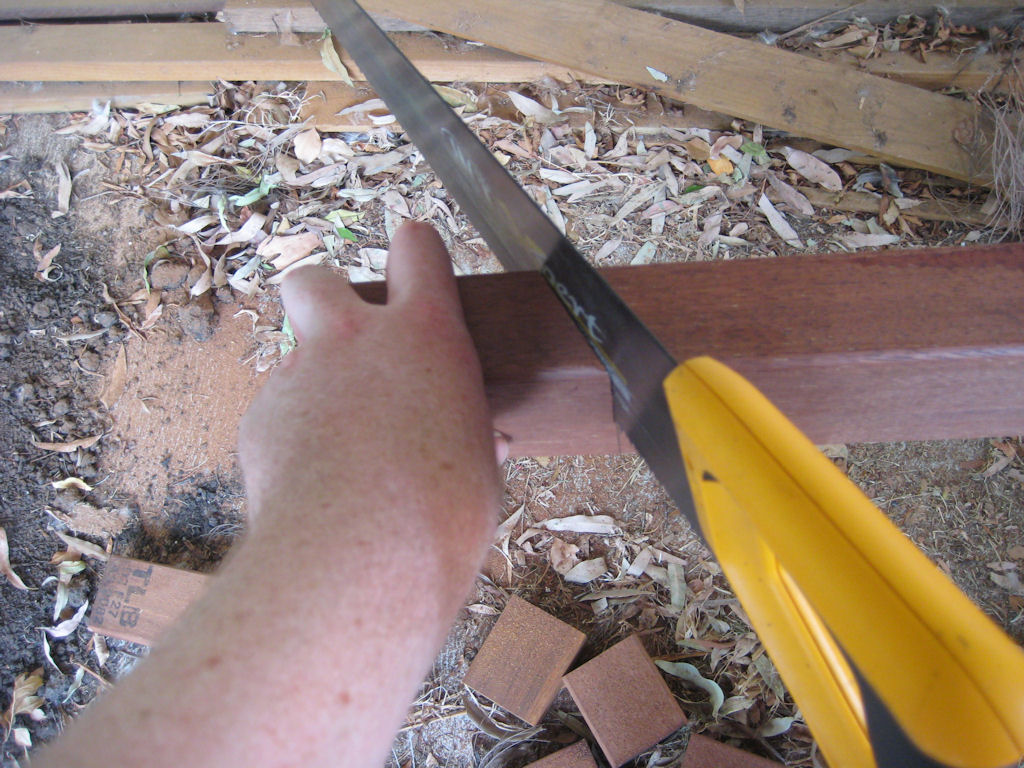
The balustrade on the stairs needed to be cut at a 60 degree angle. I didn't trust myself using the circular saw so used a hand saw for that. The cut was not 100% perfect but was able to adjust the angle by using a sanding disk attached to an angle grinder.
The next step was to route out sections where the post tops and end brackets were going to go. Now given I had never used a router before I wanted to make sure that I could use it properly and that the cuts into the wood were of good enough quality that I would be happy with. So taking an off cut I gave it a go.

Here is a shot of my first attempt of using the router and I was pretty happy with what the router could do.
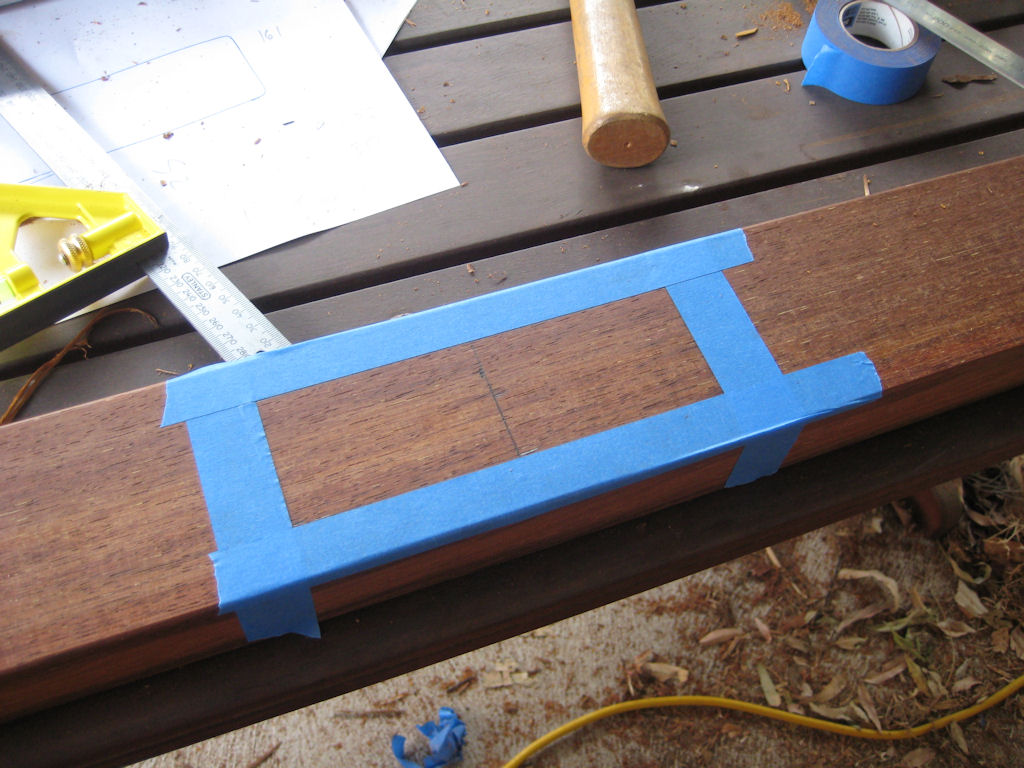
One of the biggest things that I learnt when using the router is knowing the limits of where the cut should be. So after measuring out I used some blue tape to give some additional guidance. The router kicks up a lot of dust and wood chips and found this technique to work quite well. I also used the chisel to also devine the limits of the cuts being made.
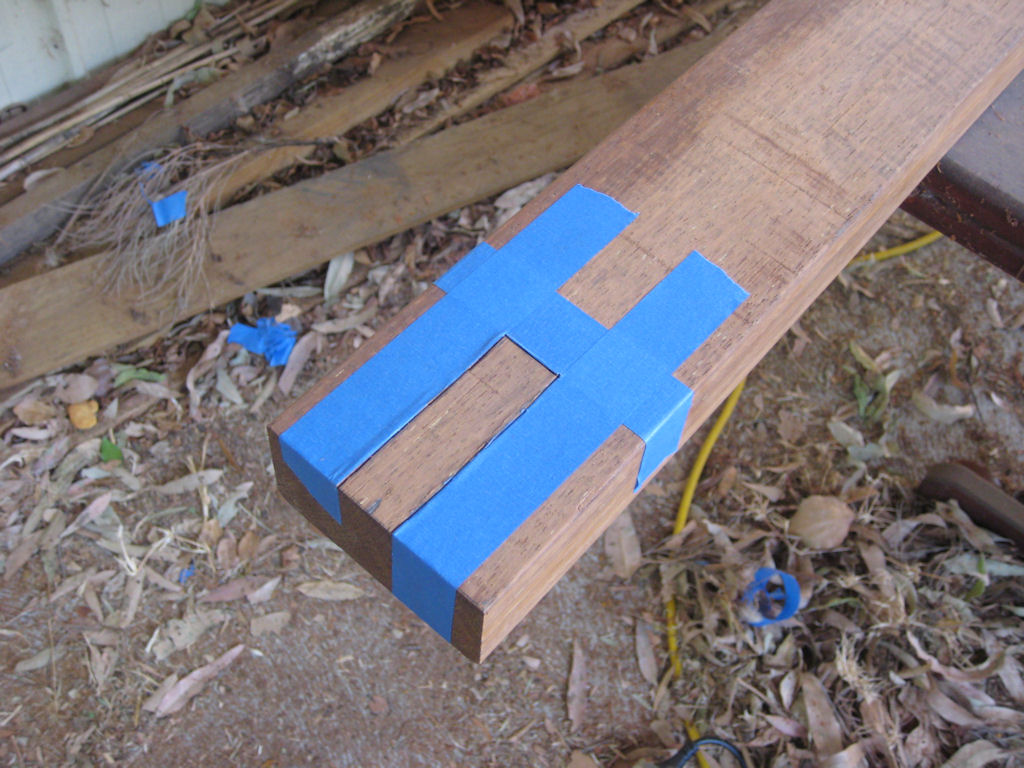
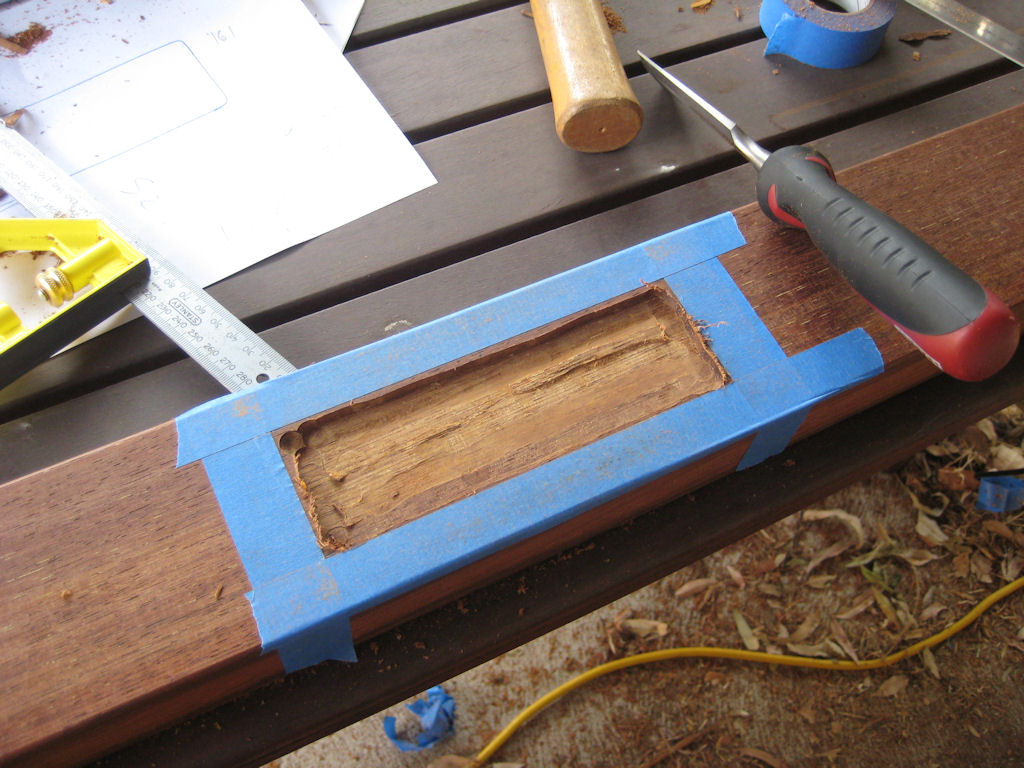
And here is the result.
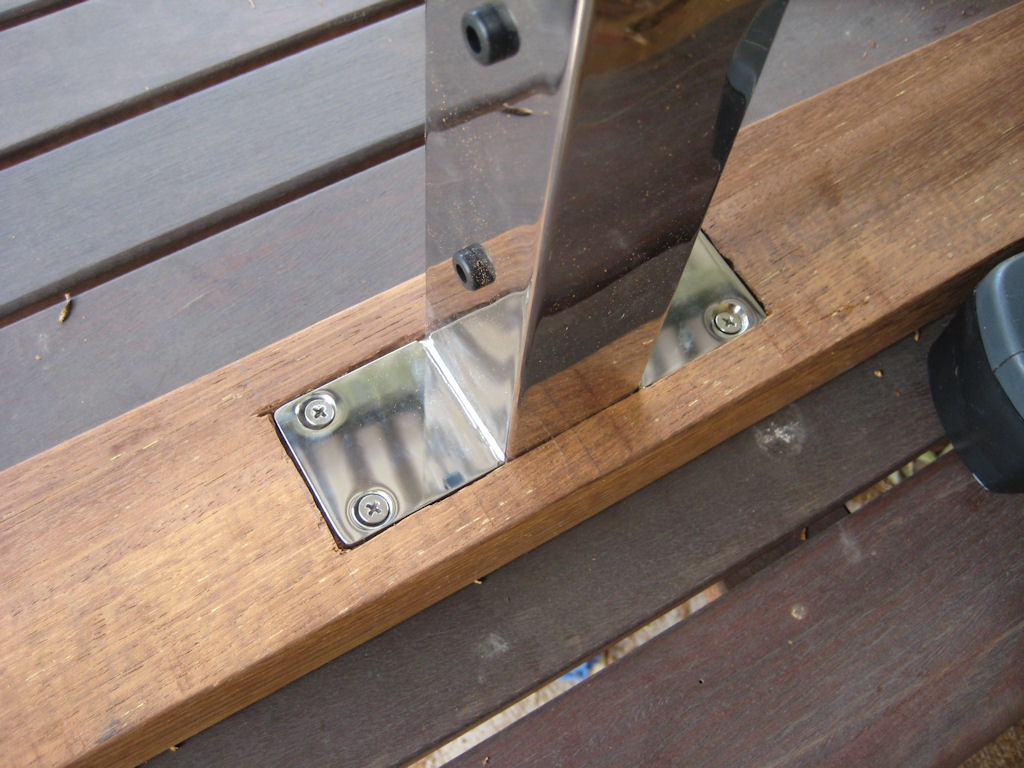
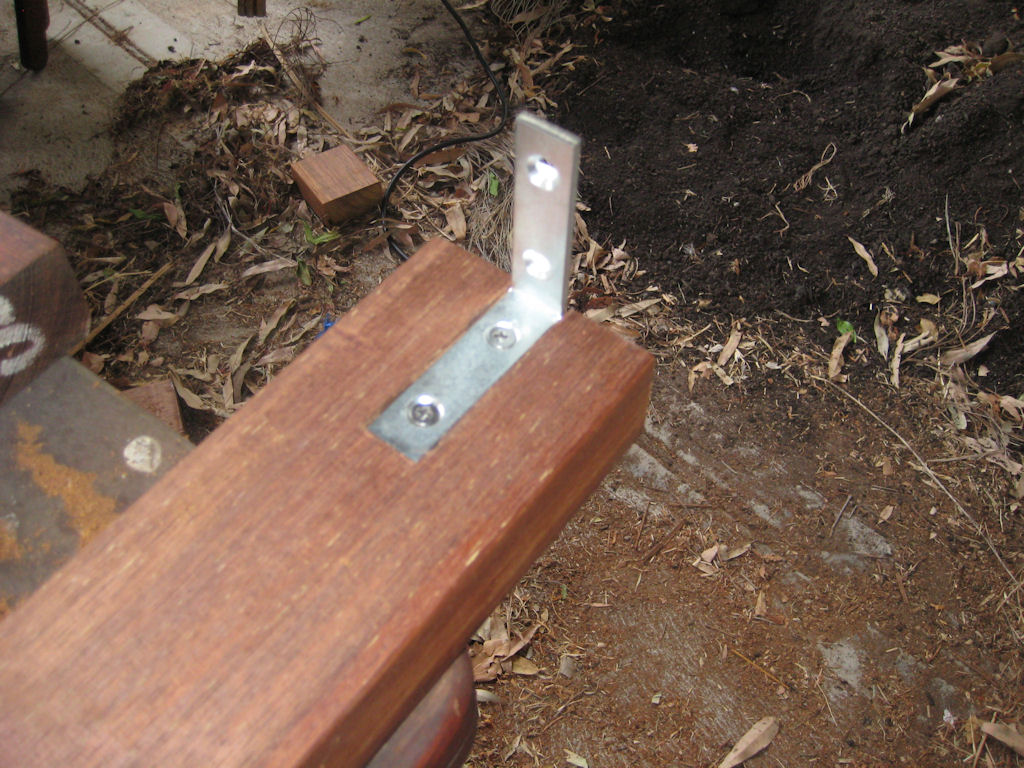
And here is the cut with the bracket set ready to go.
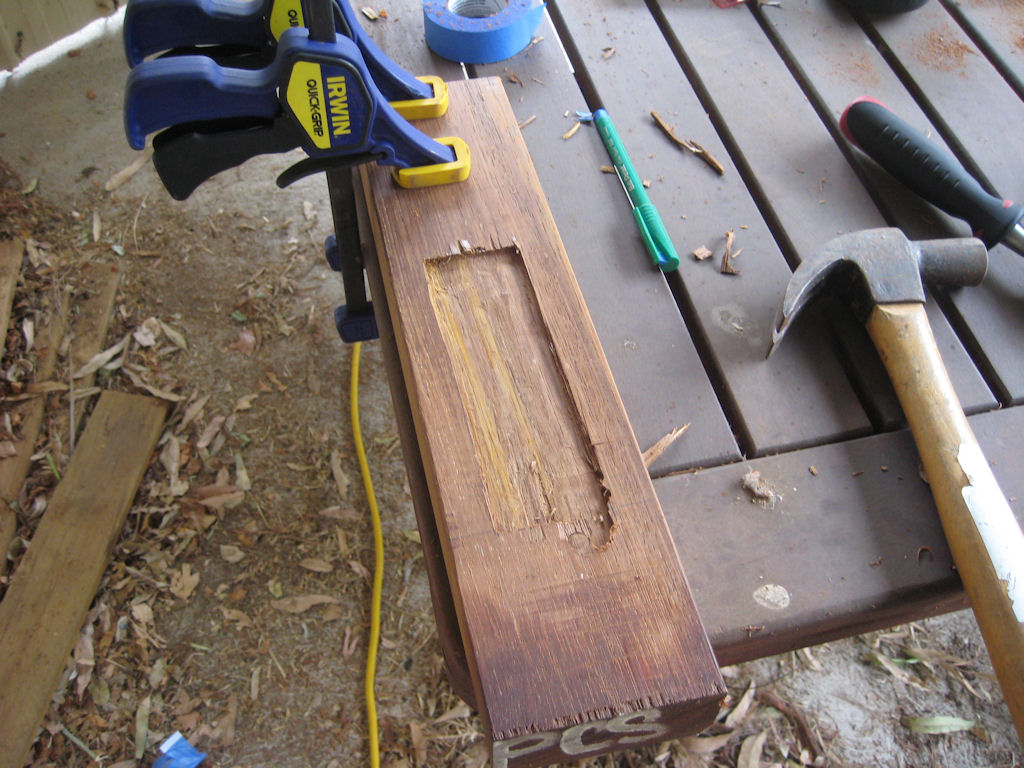
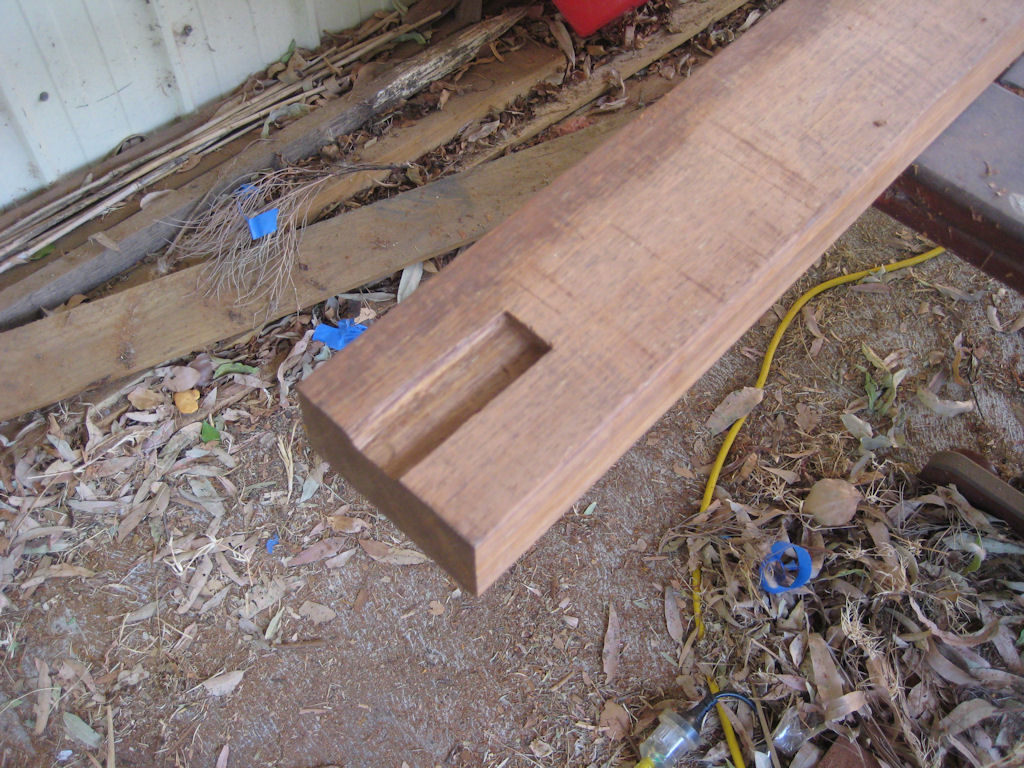
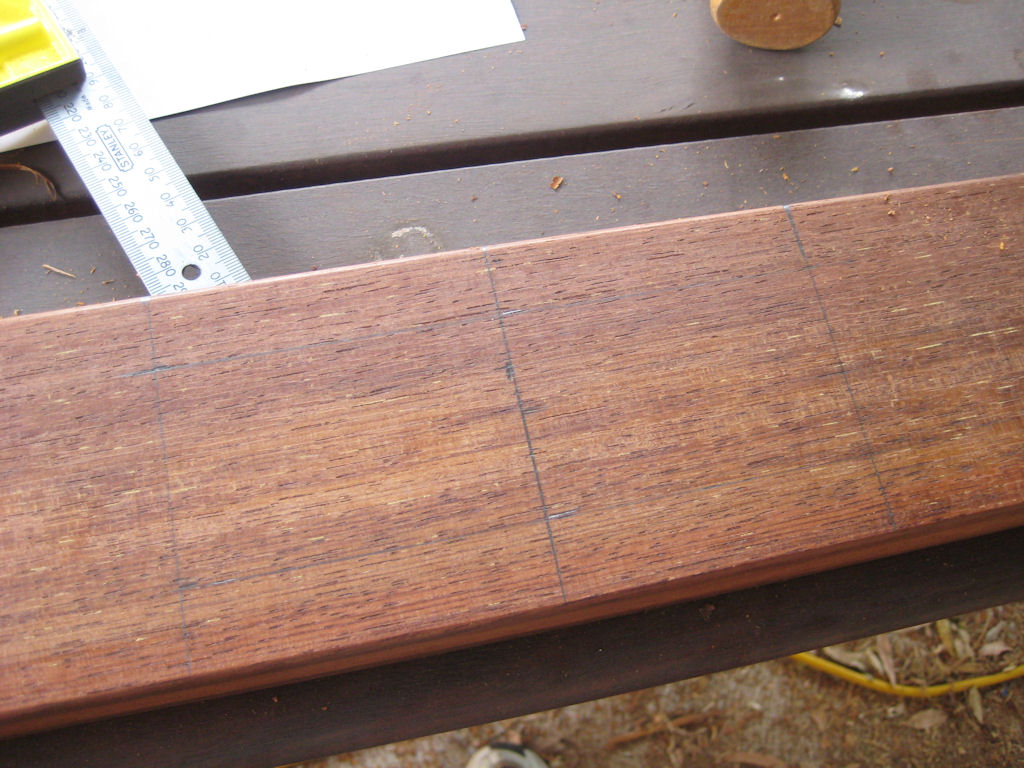
So after completing the routes for the end brackets it was then onto the cuts for the post tops. So I first measured out the cut to be made.
And then used the tape again to give me a contrast in the background when using the router.
I used the router to make 95% of the cut but then used the chisel to complete and tidy up. For those fine adjustments I would use a bit of sand paper.
The final test is to put the post in and ensure that it sits right. Using the spirit level I checked that the post was going to be level across all the faces of the post.
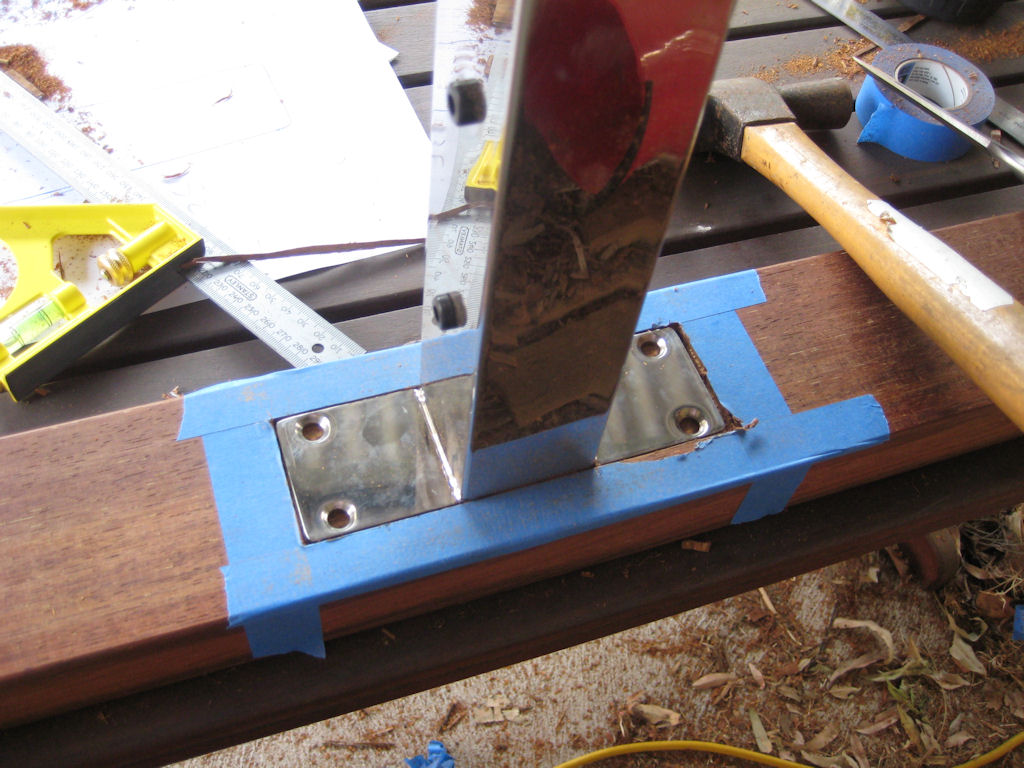
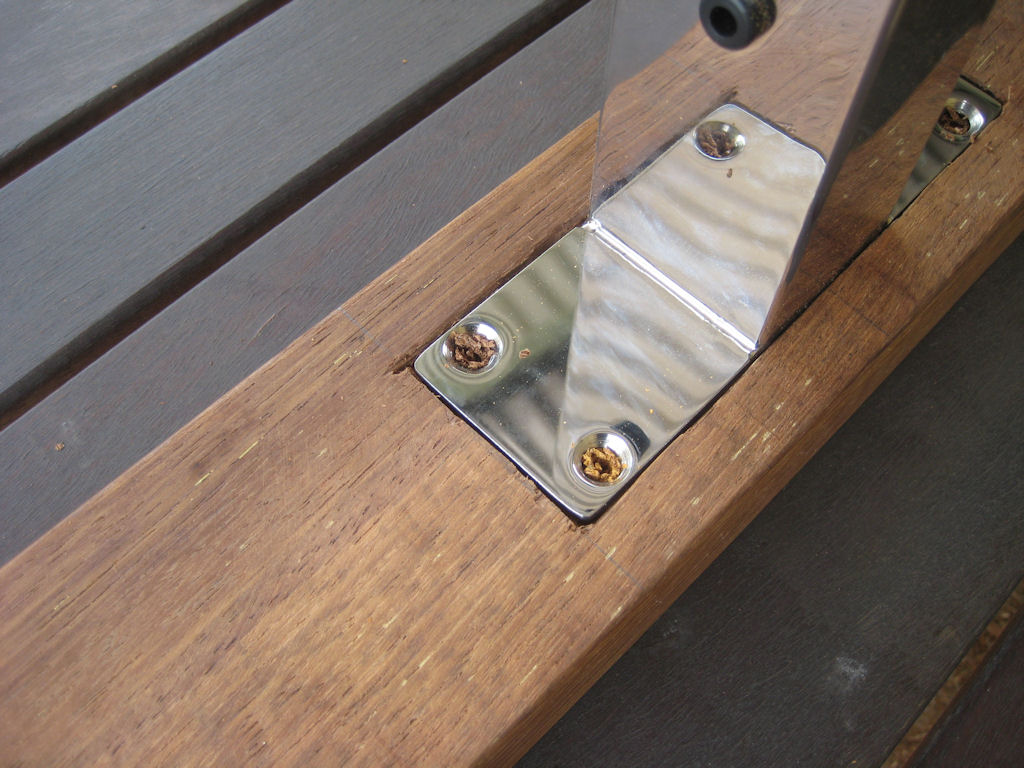
And here we have the final result. I am no professional when it comes to doing this sort of stuff but I was pretty happy with the result.
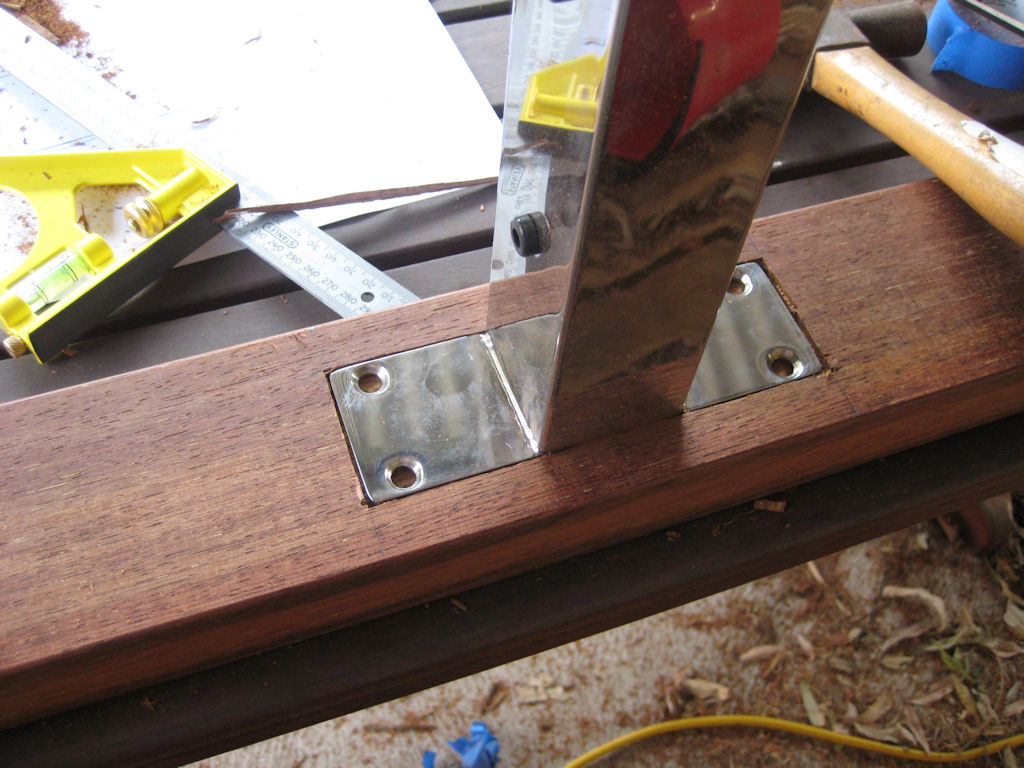
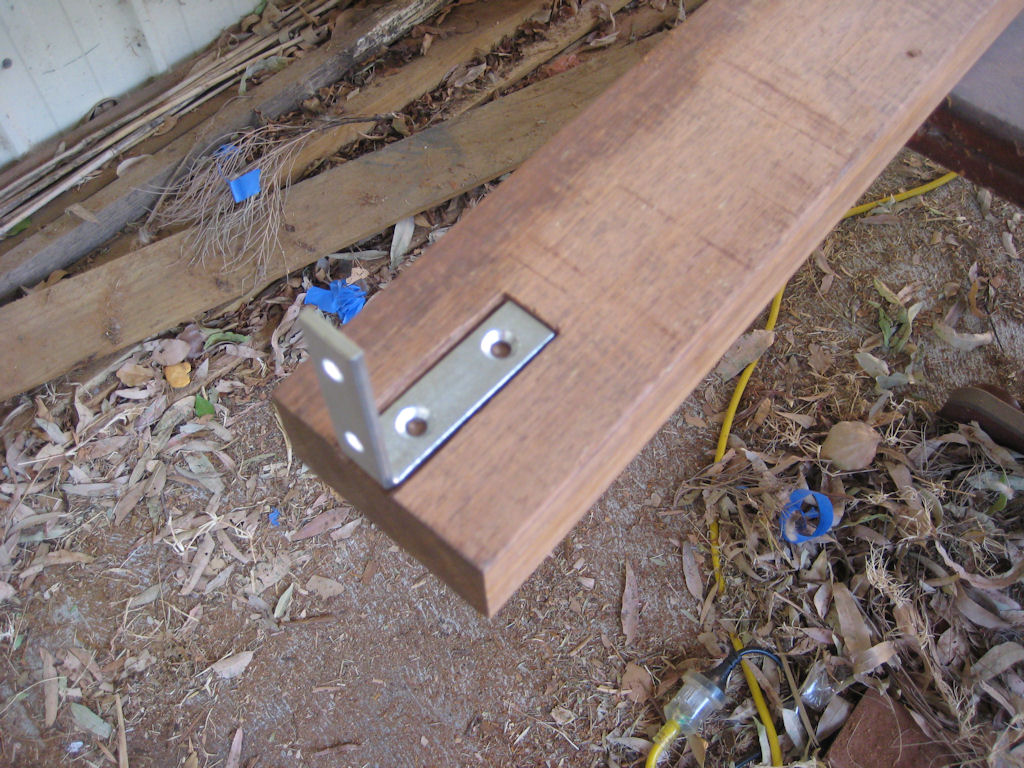
With all the routing completed the next thing to do was to start attaching the brackets and the post. I used external stainless steel screws to attach the brackets first. But as we were screwing into hardwood I ensured that pilot holes were drilled first. Here is a shot of one of the brackets installed.
Next I moved onto the post.
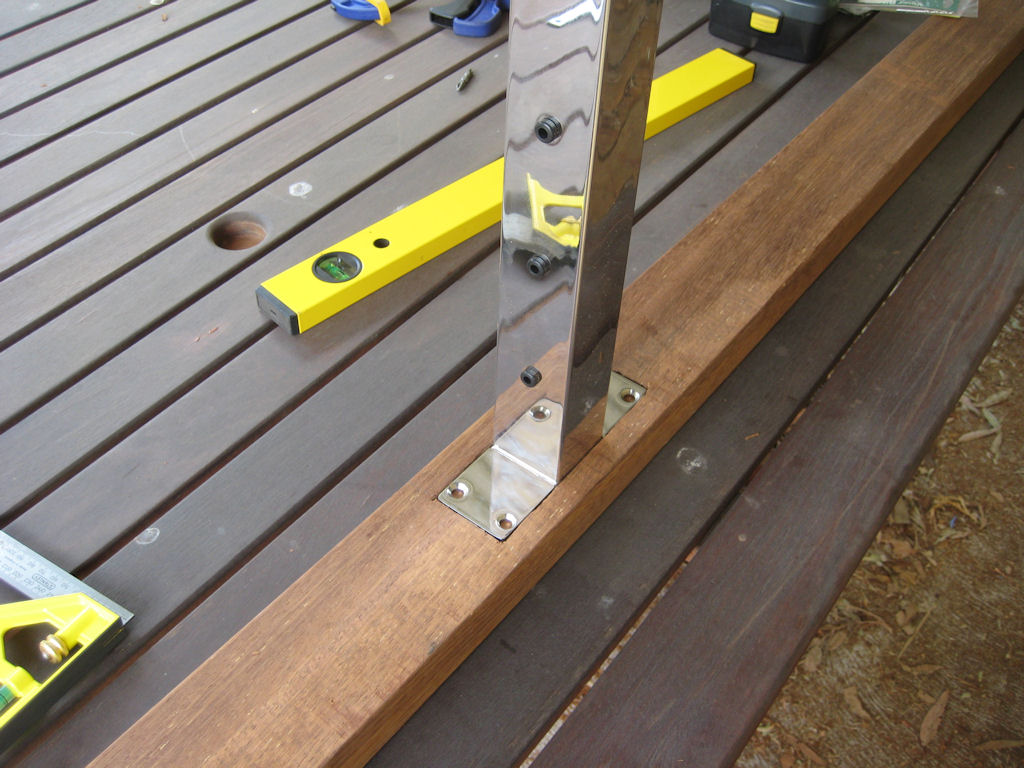
Again it was drill the pilot holes first.
And then attach the top post by using stainless steel screws.